
SQL Server Always On Availability Groups Complete Setup
In this article, We are going to explain how to authenticate Azure Function Apps with Azure Active Directory Authentication. As we know, in serverless architecture, the users only write the business logic code, and all other worries are taken care of by the cloud provider. This helps businesses to quickly implement solutions and ship it to customers with more quality. Also, another important point about serverless applications is that they are scalable on-demand, which means as a developer, we no longer need to monitor or manually pull up the resources when the executions are more.
In this article, I am going to explain complete setup for SQL Server Always On Availability Groups. Purpose of this Article is to provide instructions on the set-up for SQL Always On in Azure IaaS Infrastructure.
INTRODUCTION
Always On availability groups feature is a high-availability and disaster-recovery solution that provides an enterprise-level alternative to database mirroring. Introduced in SQL Server 2012 (11.x), Always On availability groups maximizes the availability of a set of user databases for an enterprise. An availability group supports a fail over environment for a discrete set of user databases, known as availability databases, that fail over together. An availability group supports a set of read-write primary databases and one to eight sets of corresponding secondary databases. Optionally, secondary databases can be made available for read-only access and/or some backup operations.
Prerequisites
- The servers must be built with SQL Server 2016 onwards and Windows Server 2016.
- Servers must be in the same SQL OU in the Active Directory.
- AlwaysOn Cluster Nodes in the Azure Environment for same subnet must be in the same Resource Group and same availability Set.
- Proper static DNS registration of the FQDNs for the following is required.
- DNS of the Cluster Nodes (Replica Servers).
- DNS of the Cluster Name Object (CNO).
- DNS of the Listener.
Notes:
- The Cluster Name Object (CNO) is the computer object which owns all other computer objects associated to the Windows Server Failover Cluster. This cluster name object is also the name that you will use in Create Failover Cluster section.
Different Availability Modes
The availability mode is a property of each availability replica. The availability mode determines whether the primary replica waits to commit transactions on a database until a given secondary replica has written the transaction log records to disk (hardened the log). Always On availability groups supports two availability modes-asynchronous-commit mode and synchronous-commit mode.
- Asynchronous-commit mode: An availability replica that uses this availability mode is known as an asynchronous-commit replica. Under asynchronous-commit mode, the primary replica commits transactions without waiting for acknowledgment that an asynchronous-commit secondary replica has hardened the log. Asynchronous-commit mode minimizes transaction latency on the secondary databases but allows them to lag behind the primary databases, making some data loss possible.
- Synchronous-commit mode: An availability replica that uses this availability mode is known as a synchronous-commit replica. Under synchronous-commit mode, before committing transactions, a synchronous-commit primary replica waits for a synchronous-commit secondary replica to acknowledge that it has finished hardening the log. Synchronous-commit mode ensures that once a given secondary database is synchronized with the primary database, committed transactions are fully protected. This protection comes at the cost of increased transaction latency.
Lets get this going.
Create an Internal Load Balancer
With Azure Load Balancer, you can scale your applications and create high availability for your services. Load Balancer supports inbound and outbound scenarios, provides low latency and high throughput, and scales up to millions of flows for all TCP and UDP applications.
Load Balancer distributes new inbound flows that arrive on the Load Balancer's frontend to backend pool instances, according to rules and health probes.
Steps to configure:
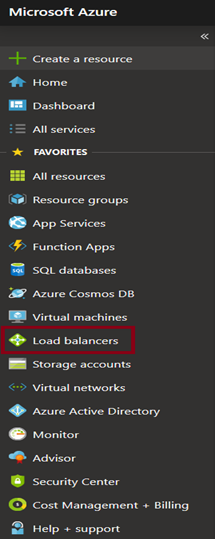
- Log into portal.azure.com using your credentials.
- Go to Load Balancer Service:
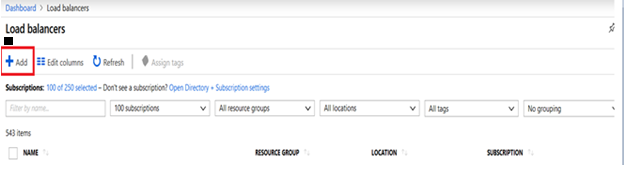
3. Click Add.
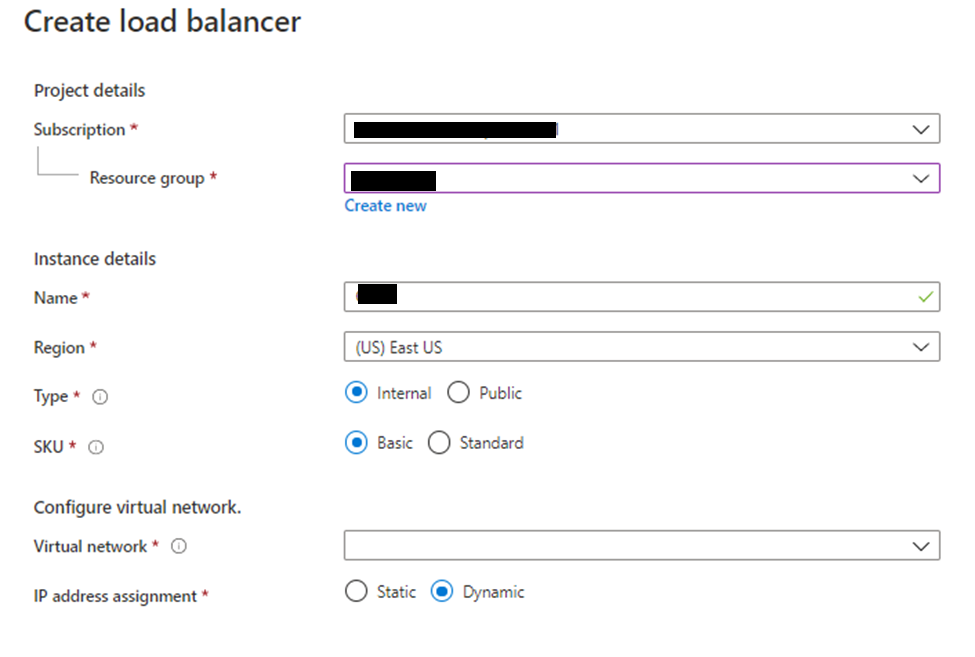
- Name: Load Balancer Name
- Type: Internal
- SKU: Basic
- Virtual Network/Subnet: Based on Data Center location choose the virtual network and the subnet associated to it
- IP Address Assignment: Static
- Private IP Address: LB IP
- Subscription: Subscription where this LB should be created provided by app team
- Resource Group: Resource group provided by app team to create LB
- Location: Location provided by app team to create the LB.
Enter all the required details and create the load balancer.
4. After load balancer is created, we need to configure additional things to finish the LB process:
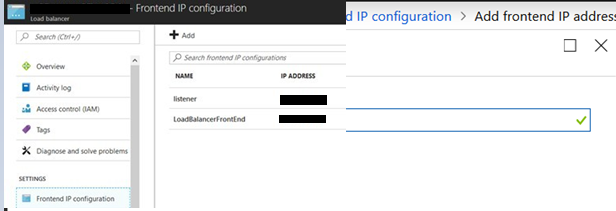
A) Frontend IP Configuration:
An additional frontend IP must be created, this one should be marked as “listener”, it is going to be used for the listener, and the rules are going to be applied over it:
Steps:
- Click your load balancer, then on settings section click Front end IP Configuration and add:
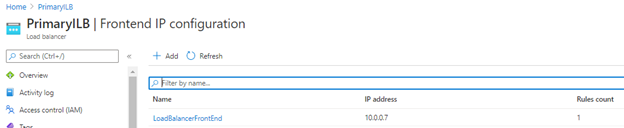
2. Add the frontend IP:
- Name: Listener
- Subnet: Will be the actual LB subnet, so no action is required
- IP Address: Listener IP Address
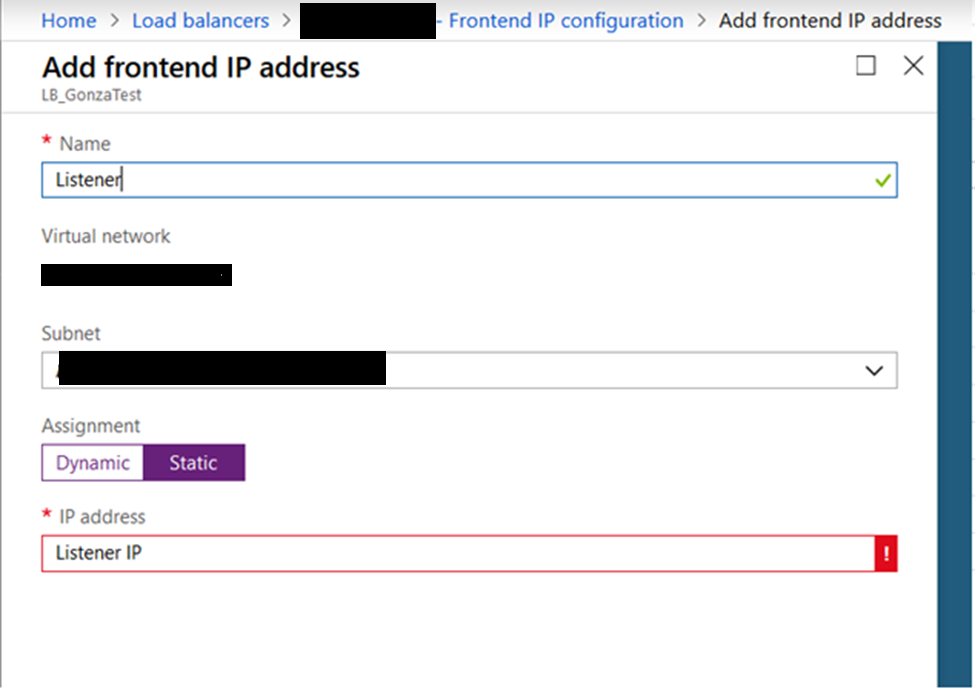
Example:
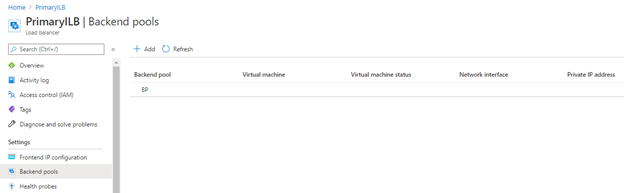
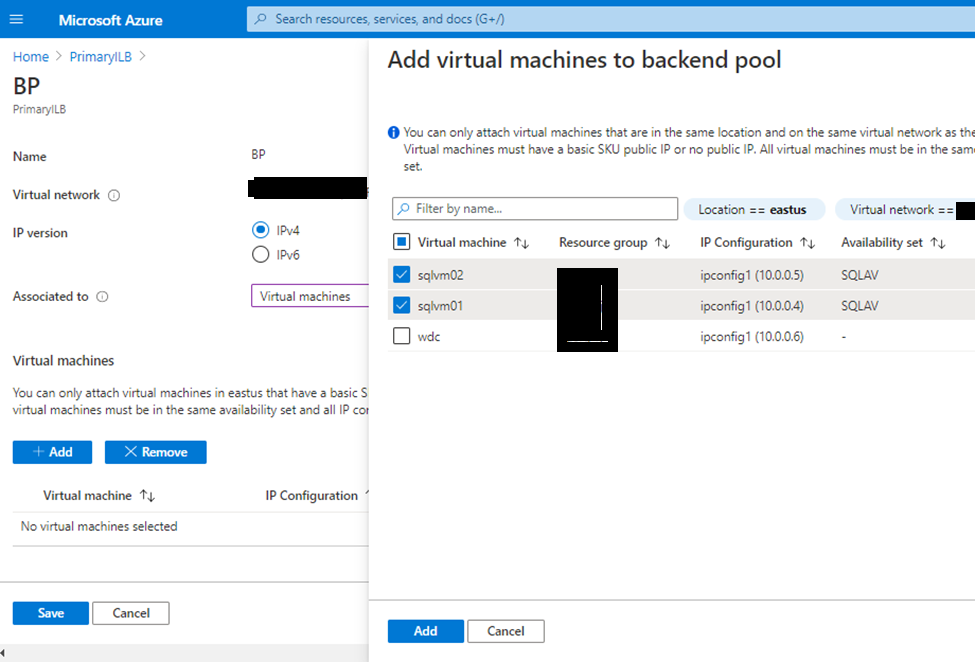
- Backend Pool:
Azure calls the back-end address pool backend pool. In this case, the back-end pool is the addresses of the two SQL Server instances in your availability group.
Steps:
- Configure Backend Pool:
- Name: Backend Pool
- Associated to: Availability Set
- Availability Set: Availability Set where VMs were created
- Then click + Add a target network IP Configuration

Add each VM that will be on the cluster and on each VM choose the primary NIC.
Result expected:
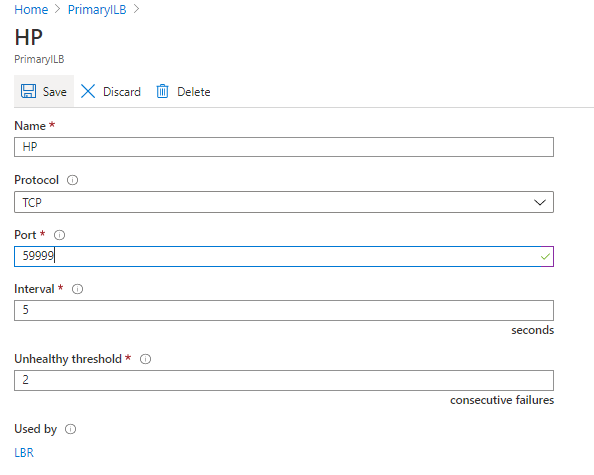
- Health Probes:
The probe defines how Azure verifies which of the SQL Server instances currently owns the availability group listener. Azure probes the service based on the IP address on a port that you define when you create the probe.
Steps to configure it:
- Click on Health Probes then add:
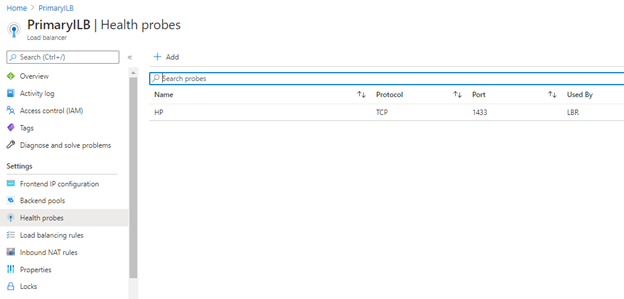
- Name: Load balancer name _ HP (Health Probe) _ 59991
- Protocol: TCP
- Port: 59991
- Interval: 5
- Unhealthy threshold: 2
Result expected:
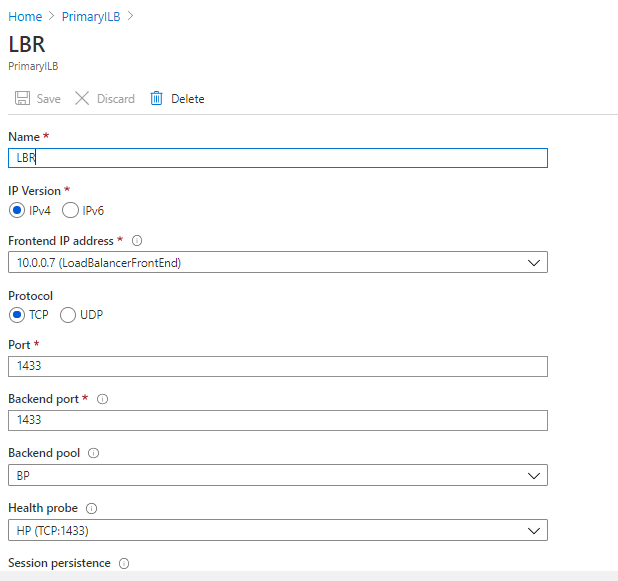
- Load Balancing Rules:
The load balancing rules configure how the load balancer routes traffic to the SQL Server instances. For this load balancer, you enable direct server return because only one of the two SQL Server instances owns the availability group listener resource at a time. You’ll have to create two rules, one for port 1458 (Listener) and one for port 1367 (SQL Server Service):
Steps to configure it:
- On your load balancer click Load Balancing Rules and then click Add:
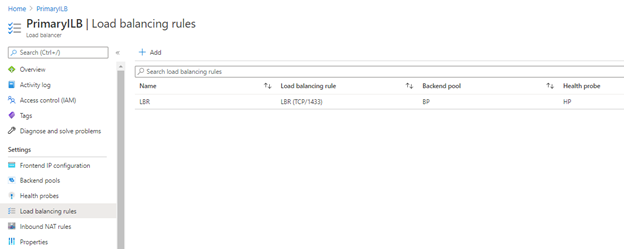
- Name: LB Name_SQL_ListenerName_Listener_portnumber
- IP Version: IPV4
- Frontend IP Address : Listener IP (The same that we used to configure the frontend listener IP)
- Protocol: TCP
- Port: 1458 or 1367 (Depending of the rule that you are configuring, remember that you will have to create one rule per port)
- Backend Pool: The backend pool that you configured on step B)
- Health probe: The health Probe that you configured on step C)
- Session Persistence: None
- Idle Timeout (Minutes): 4
- Floating IP (Direct Server Return): Enabled
Example Rule using listener port:
Create a Failover Cluster in Windows 2016
Before start configuring windows clustering VM to VM communication should be enabled between all the nodes those are participating in clustering. As there is no static IP concept in the azure environment there should be a load balancer created as per the Section 5 in each site and an IP from primary site to be assigned to it which will be used as cluster IP, the second IP assigned to the load balancer will be used as listener IP. The cluster IP should be assigned from same subnet of the nodes from the Primary site.
Install cluster features in all the 3 nodes
- On each VM, open a Powershell window and execute the following command:
Install-WindowsFeature -Name Failover-Clustering –IncludeManagementTools
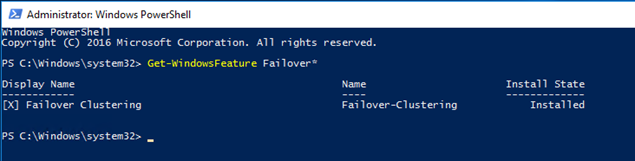
- Verify that the install is successful by running the command in the PowerShell:
Get-WindowsFeature Failover*
Result Expected:
- Before creating a new cluster, validate if the nodes will be able to join the cluster. On any of the nodes that will participate on the cluster, Open the PowerShell program and type the following command then Enter:
Test-Cluster -Node Server1,Server2 (Where Server 1 and Server 2 are the nodes that will participate on the cluster)
- Wait until the validation is completed
- Verify that there are no errors. As long as the test result says that it is at least ClusterConditionallyApproved then you can proceed. You can disregard warnings on storage as that won’t be leveraged for always On
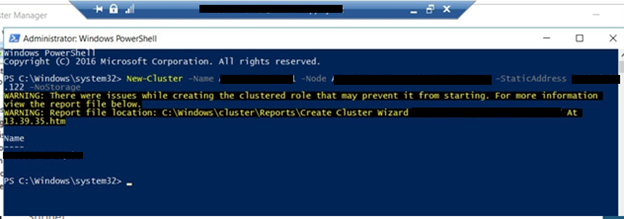
- After this validation is complete, on the same powershell window execute the following powershell commands in order to create the cluster:
New-Cluster –Name ClusterName -Node Server1,Server2 –StaticAddress ClusterIP –NoStorage
- Wait until the cluster is built
Result expected:
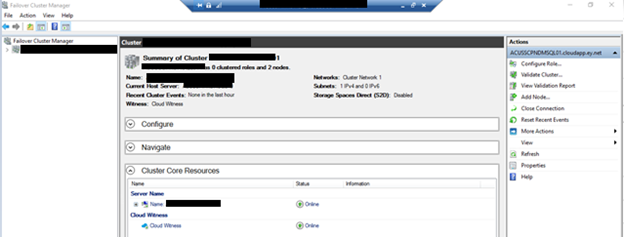
Configure Cloud Witness in Windows 2016
- On any cluster node, open a powershell window and execute the following code:
Set-ClusterQuorum -CloudWitness -AccountName <StorageAccountName> -AccessKey <StorageAccountAccessKey>
- Account Name: Storage account name provided by app team
- AccessKey: Storage account key for the storage account
Result Expected:
Enable Availability Group Always On Feature
- AD Account should be configured for SQL server service account for all Nodes
- SQL sysadmin access should be granted to “SQL Team” group.
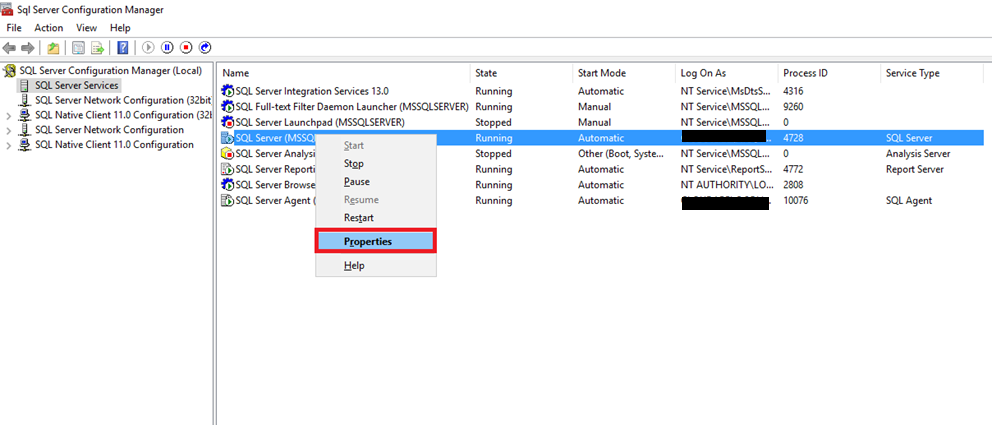
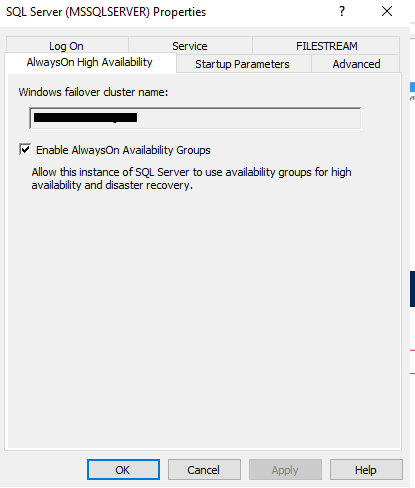
- Open SQL Server Configuration Manager then right click on SQL Server Service and click properties
- Click AlwaysOn High Availability tab and click on Enable AlwaysOn Availability Groups and then Ok
- Restart SQL Server Service
- Repeat these steps for all Cluster node members to enable this feature
Result Expected:

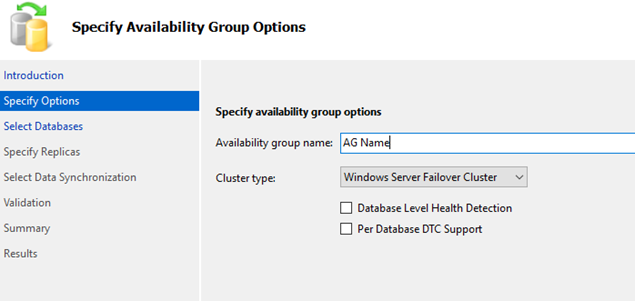
Create Availability Group Always On
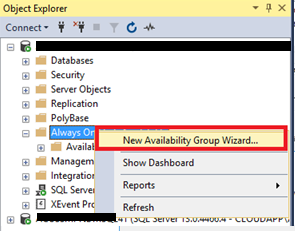
- Open SQL Server Management Studio and connect to any of the nodes
- Right click on Always On High Availability and click New Availability Group Wizard:
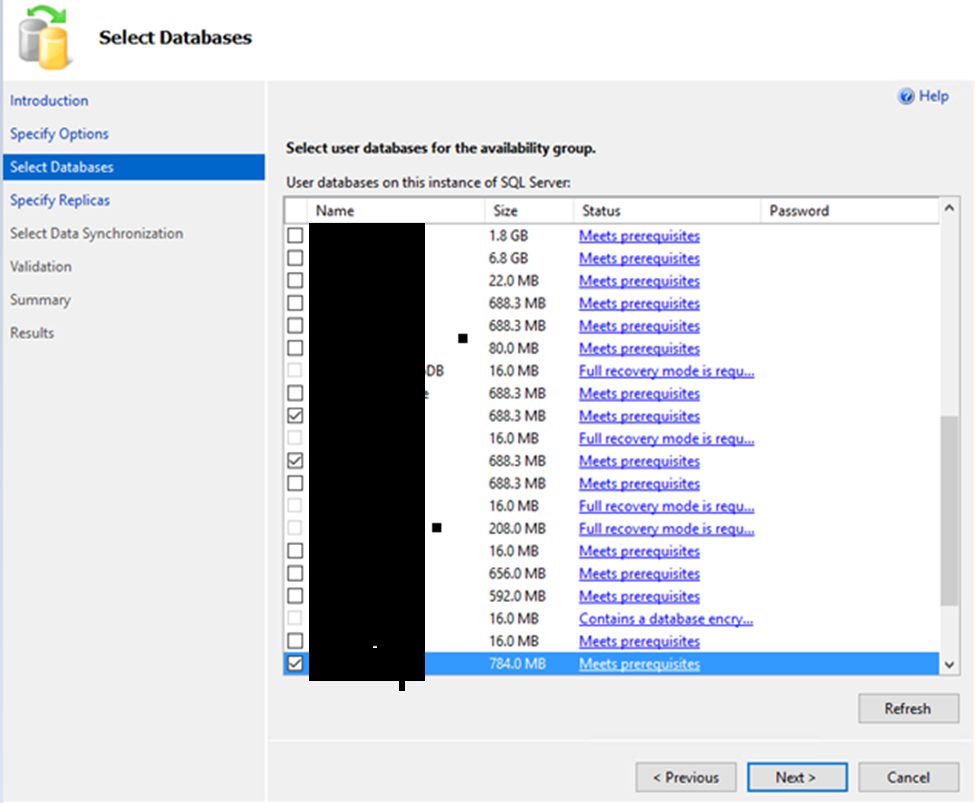
3) Select Databases Tab: Choose the databases that will be hosted on the AG
4) Specify replicas section:
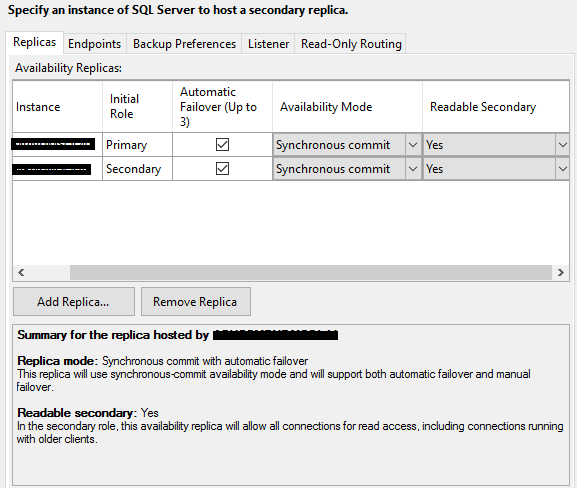
- Tab Replicas:
- Add the replicas that will be hosted on the AG
- Click Automatic Failover
- Availability Mode: Synchronous Commit
- Readable Secondary: Yes
- Tab Endpoints: No Changes
- Tab Backup Preferences: Primary

- Tab Listener: No Changes
- Tab Read-Only Routing: No Changes.
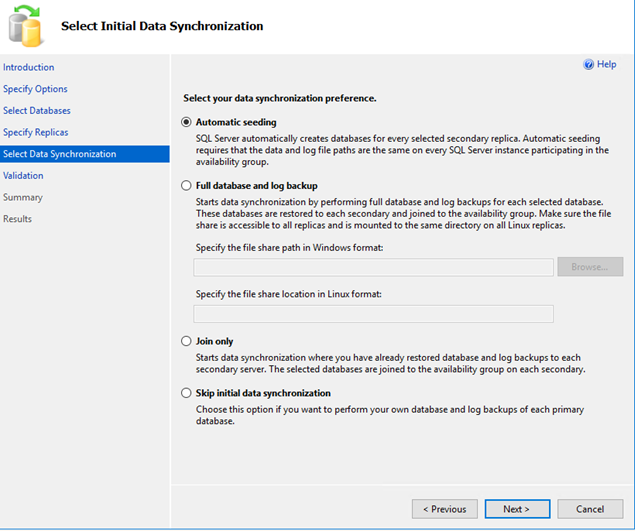
5) Select Data Synchronization
- Click Automatic Seeding and then next:
6) Validation Page: No actions needed, just click next
7) Summary Page: No actions needed, just click Finish
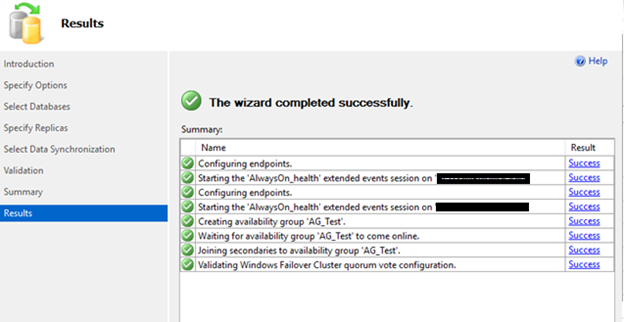
9) Automatic Seeding process will start, WAIT UNTIL IT FINISHES!
Remarks
- Adding Replica using SQL Server query
- Manual Failover & Fail back Testing query.
Create Availability Group Always On Listener
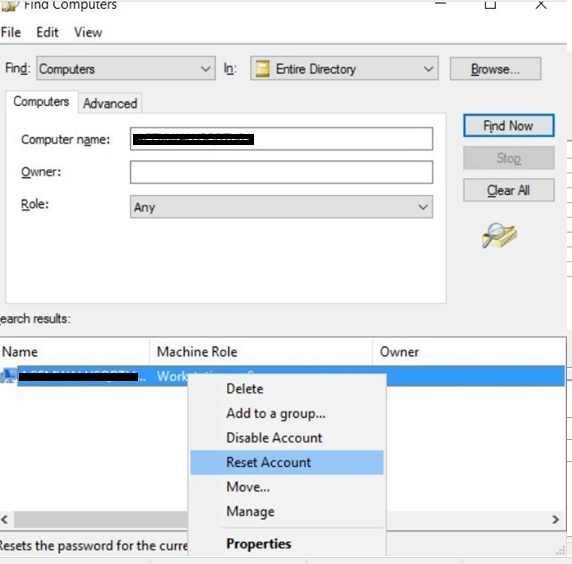
- Create the computer object for the listener in the SQL OU
- Give full permissions to the cluster object over the listener object in the “security” tab
- To complete it, right click the listener object, and choose the “Reset account” action to make it available for the SQL team when they configure it.
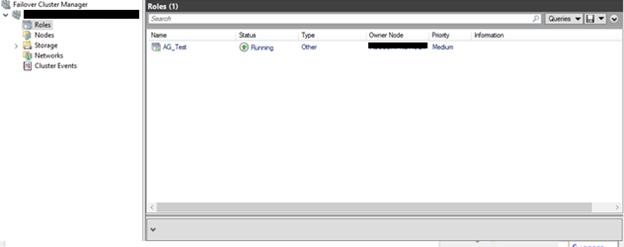
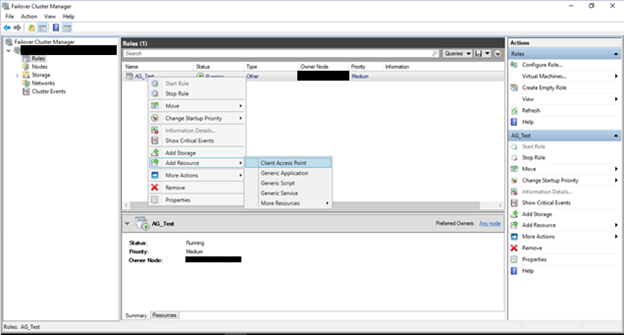
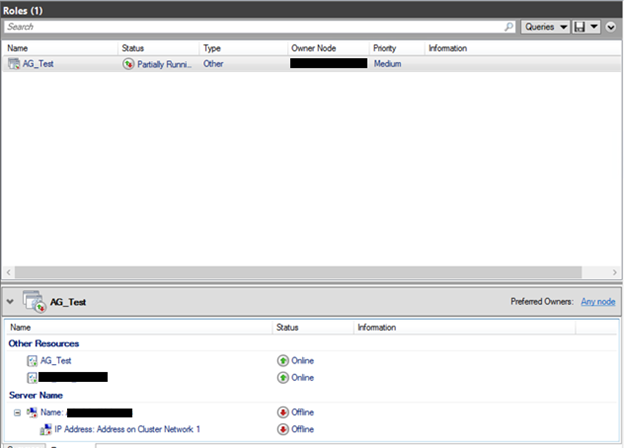
4) On any cluster node, open a failover cluster manager window, go to roles and search for the AG that you already created on section 9:
5) Right click on the role, Add Resource and click Client Access Point:
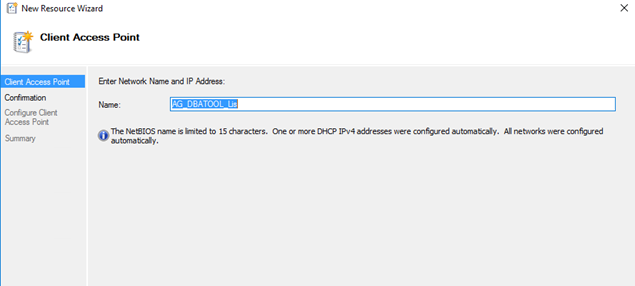
6) Enter Listener Name:
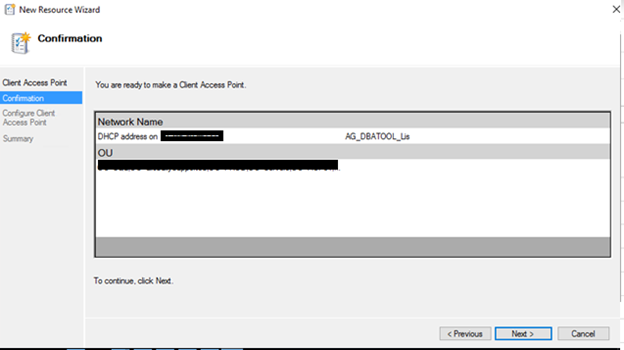
7) Confirmation Tab: Review the listener name and click next
8) Summary Tab: Click Finish and the Client Access Point Will be configured.
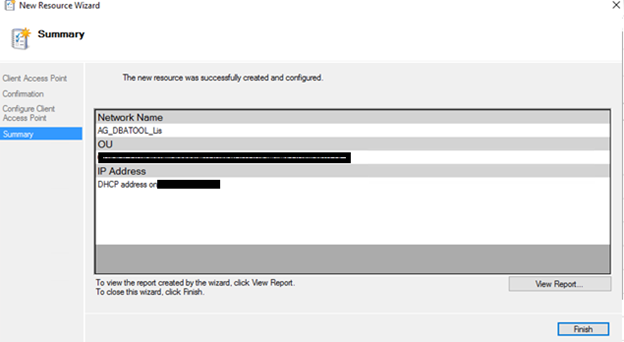
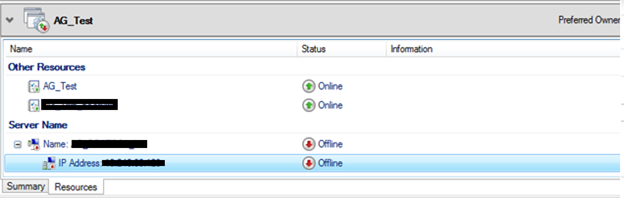
9) After this process finished, click on Resources Tab and you will see your client access point created under “Server Name” section:

10) Configure the Static Listener IP Name and Address:
Right click under the IP Address section on the listener name that you created before and click properties:
11) Open a Powershell window and execute the following script on each cluster node:
#Define the variables
$ClusterNetworkName = "Cluster Network 1" # the cluster network name
$IPResourceName = "IP Address" # the Listener IP Address resource name
$ILBIP = "xx.xx.xx.xx" # the IP Address Front-End for the Listener
$SubnetMask = "xx.xx.xx.xx" # the Subnet Mask of the Network
$Probeport="59991" # Port that you configured on the ILB
Import-Module FailoverClusters
Get-ClusterResource $IPResourceName | Set-ClusterParameter -Multiple @{"Address"="$ILBIP";"ProbePort"="$Probeport";"SubnetMask"="$SubnetMask";"Network"="$ClusterNetworkName";"OverrideAddressMatch"=1;"EnableDhcp"=0}
12) Navigate back to Failover Cluster Manager. Expand the Cluster Name and click Roles and then highlight your Availability Group. On the Resources tab, right-click the listener name and click Properties. Click the Dependencies tab. If there are multiple resources listed, verify that the IP addresses have OR, not AND, dependencies. Click OK.
13) Right-click the listener name and click Bring Online.
14) Once the listener is online, from the Resources tab, right-click the availability group and click Properties. Configure the Availability Group Resource.
15) Create a dependency on the listener name resource (not the IP address resources name). Click OK. Add Dependency on the Listener Name.
16) Launch SQL Server Management Studio and connect to the primary replica.
17) Navigate to AlwaysOn High Availability | Availability Groups | <AvailabilityGroupName> | Availability Group Listeners. You should now see the listener name that you created in Failover Cluster Manager. Right-click the listener name and click Properties
18) In the Port box, specify the port number for the availability group listener by using the 1458 Port.
19) Check if the listener name is accessible via Management Studio from both replicas.
We have Successfully completed the whole setup for configuring SQL server Always On Availability Groups.
If you find anything wrong above, feel free to correct me by leaving a message in the comment section. Thanks!
Thanks for Reading…!!!!!